
This week’s technique
combines Copic markers and vellum to create a very soft image. The stamped image is colored on the back of the side of the vellum. The
translucence of the vellum softens the colors from the Copic markers and
provides a much different look than you get when you color on the front of the
image.

To begin I selected one of my
favorite stamps from Magenta’s last release, Apple Blossom Bouquet
(14.655.P.) I cut a piece of lightweight
vellum to 4” x 5 ¼” and placed it in my MISTI.

Use a powder tool over the
surface of the vellum to eliminate any static then stamp the image using
VersaMark ink. Remove the stamped image
from the MISTI, sprinkle White Diamond Embossing Powder over the entire image
then tap off the excess.
Before starting to heat the
image to melt the embossing powder, let your heat gun warm up for 20-30
seconds. The key to embossing vellum is
to keep your heat tool moving at all times and also move from the front of the
image to the back of the image. I have
found that heating it from both sides, while keeping the heat tool moving, heats
the image evenly and keeps the paper from warping.
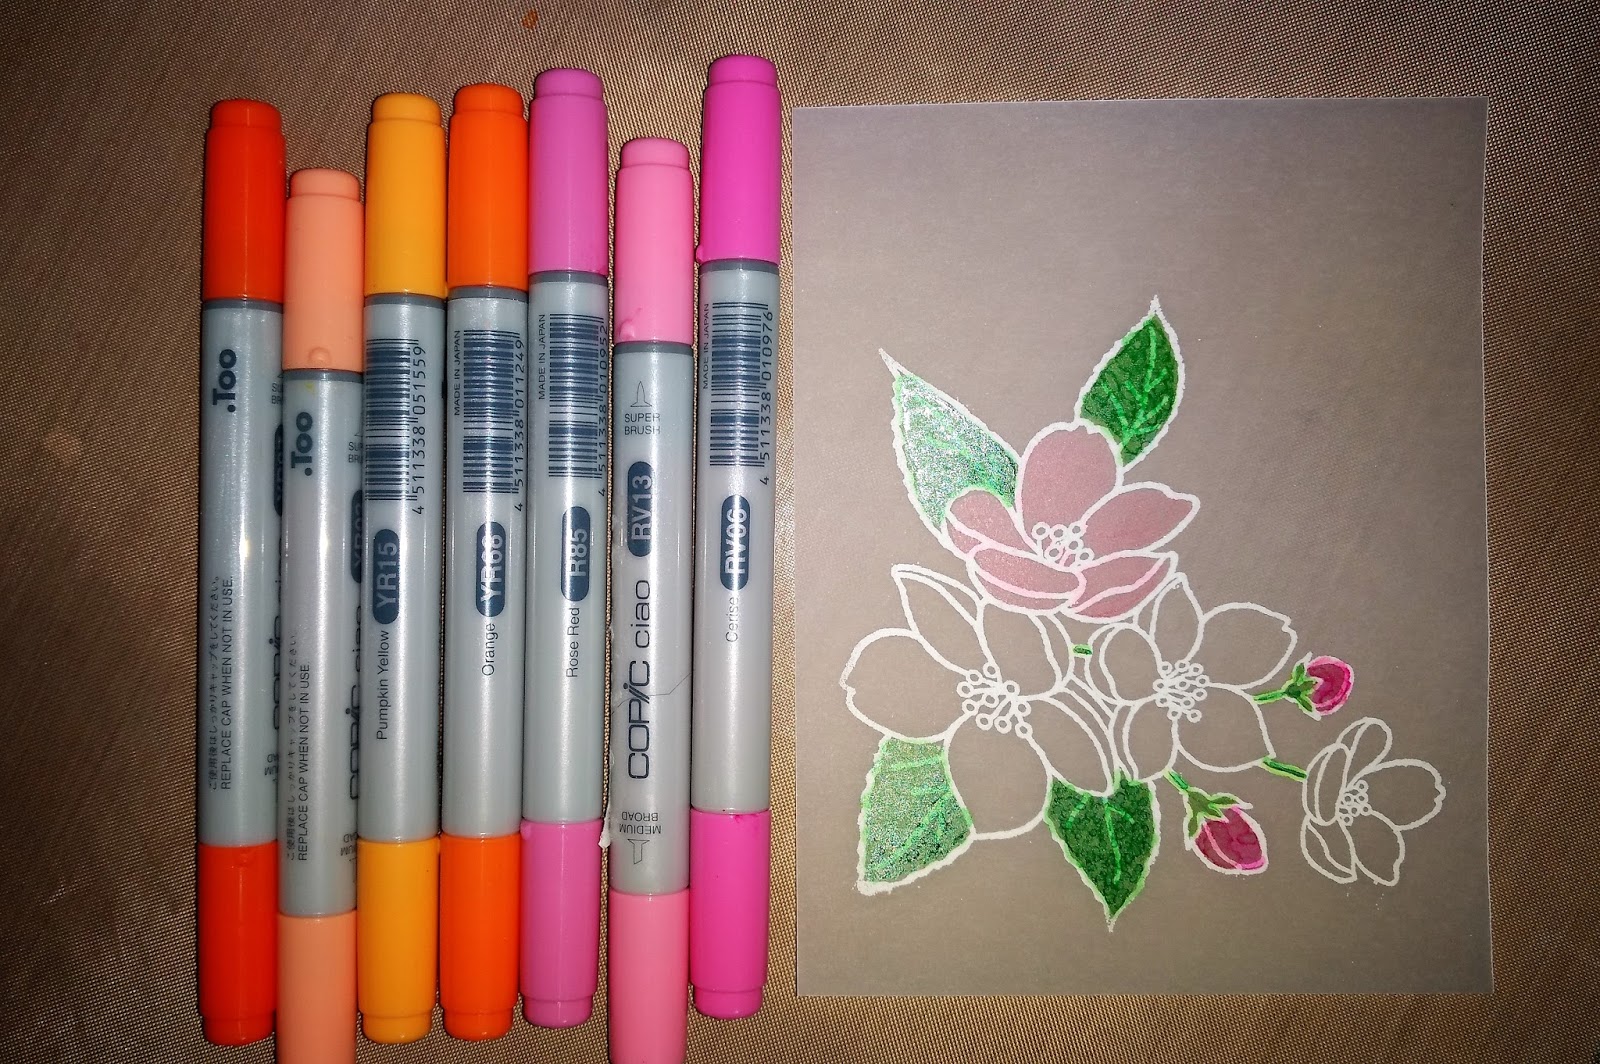
For this image I selected a
variety of Copic Markers in greens, oranges and pinks. I found that the darker colors showed through
the vellum a bit better because of the translucence of the vellum. However, I encourage you to try different
colors to see what you like.
BE SURE TO BEGIN ON THE BACK
OF YOUR IMAGE. It’s very easy to start
coloring on the front. Just remember to
feel for the texture of the embossed image to tell the front from the back.
 |
| The back side of the image after the leaves were colored. |
 |
| The front side of the image after the leaves were colored. |
I began with the leaves and used short brush strokes to put the color down. Copic markers react differently on vellum than on cardstock because the ink can’t be absorbed into the vellum, it must evaporate. However, that’s also an advantage because after the ink has dried, you can color over it and the dried color will be reactivated.
Rather than using
brushstrokes to color and blend colors, you can also make a series of small
dots, close together to put color down.
This creates an interesting texture when you look at the card from the
front. After the leaves are completed,
move on to the flowers. Look at your
card from the front periodically to see if the color is dark enough.
 |
| The back side of the completed image. |
 |
| The front side of the completed image. |
You don’t have to be extra careful to stay within the lines with this technique. If you do go outside the lines, the embossed lines provide a bit of forgiveness. If you do go outside the line of the embossed lines you can use a Copic Colorless Blender to remove it. (A bit of alcohol ink blending solution, or 91% rubbing alcohol on a tiny applicator also works.)

I planned to use two of the
new dies from the recent Poppy Stamps release, Little Luxe Hello (#1819) and
Tailored Stitches (#1788) on the front of my card, but I wanted them to
complement the stamped image. I created
a piece of glittery card stock by covering a piece of scrap white cardstock
with VersaMark and then sprinkling White Diamond Embossing Powder over the
top. After heat setting it, I let it
cool for a few minutes before die cutting.
Tailored Stitches contains
three different “stitched” edge dies.
You place it along the edge of a piece of straight cardstock and then
die cut it to get a nice border piece. You control the width of the strip by
how close you place the die to the straight edge of your paper.

I adhered a piece of 1/8”
ScorTape to the back of the die cut and then adhered that to the left edge of
the vellum.

I put another piece of 1/8”
ScorTape on the back of the vellum, under the stitched die cut and then adhered
it to a piece of So Silk Beauty Pink cardstock cut to 4” x 5 ¼”. I adhered that to the front of a white A2
card.
Die cut the “Hello” from the
White Diamond paper and adhere to the front of the card. Add a few drops of Range Multi Medium Matte
On the back side of the vellum, under the “Hello” and hold in place for a few
seconds. Using die cut images on the
vellum provides a way to hide the adhesive that is used to adhere the vellum to
the card stock.
The last step is to add a few
drops of Nuvo White Blizzard accent drops.
You could also add sequins or other embellishments. These will take longer to dry on the vellum
so it’s best to set the card aside for a while, or overnight, for drying.
The card us on display at Art 'n Soul so I hope you will stop in to see it. While you are there, check out the great class samples from Kae Pea of Rubbermoon and Lynell Harlow, creator of Dreamweaver Stencils. We have some amazing classes lined up for you.
The card us on display at Art 'n Soul so I hope you will stop in to see it. While you are there, check out the great class samples from Kae Pea of Rubbermoon and Lynell Harlow, creator of Dreamweaver Stencils. We have some amazing classes lined up for you.

I created this card using
this technique with Magenta’s Blossom Square stamp (#14.657.P) and Poppy Stamps’
Thank You Streamer die (#1796). You can also see another idea for the Blossom Square stamp in a previous technique here.
I hope you will try technique as it’s a fun way to use your Copic markers – then share your creations with us because we’d love to see them!
No comments:
Post a Comment
Thank you so much for taking the time to comment! Please visit us again soon.