This fabulous DIY Technique for creating a storage rack for Distress inks is by Marj Marion!
 |
| Distress Storage Rack by Marj Marion |
Part of the art of stamping is
continually finding better ways to store our (ahem!) growing number of
supplies, right? I have a rack with shelves that holds my Memento and Archival
Ink pads. For some time, I have stored my Distress Ink Pads stacked up on top
of this rack. However, I was always piling them up, trying to reach the ones I
wanted, and decided it was time for a better storage solution!
I researched commercial racks online,
but decided to try my hand at making one that would exactly fit my space and
needs. The basic structure was made with black foam board pieces, glued
together with a hot glue gun. Here is a list of the tools I used to build this
storage rack.
*black foam board
*hot glue gun and glue sticks
*long, sturdy metal ruler
*pencil
*Walnut Hollow Professional Hot Knife
- you can order this from Art ’n Soul!
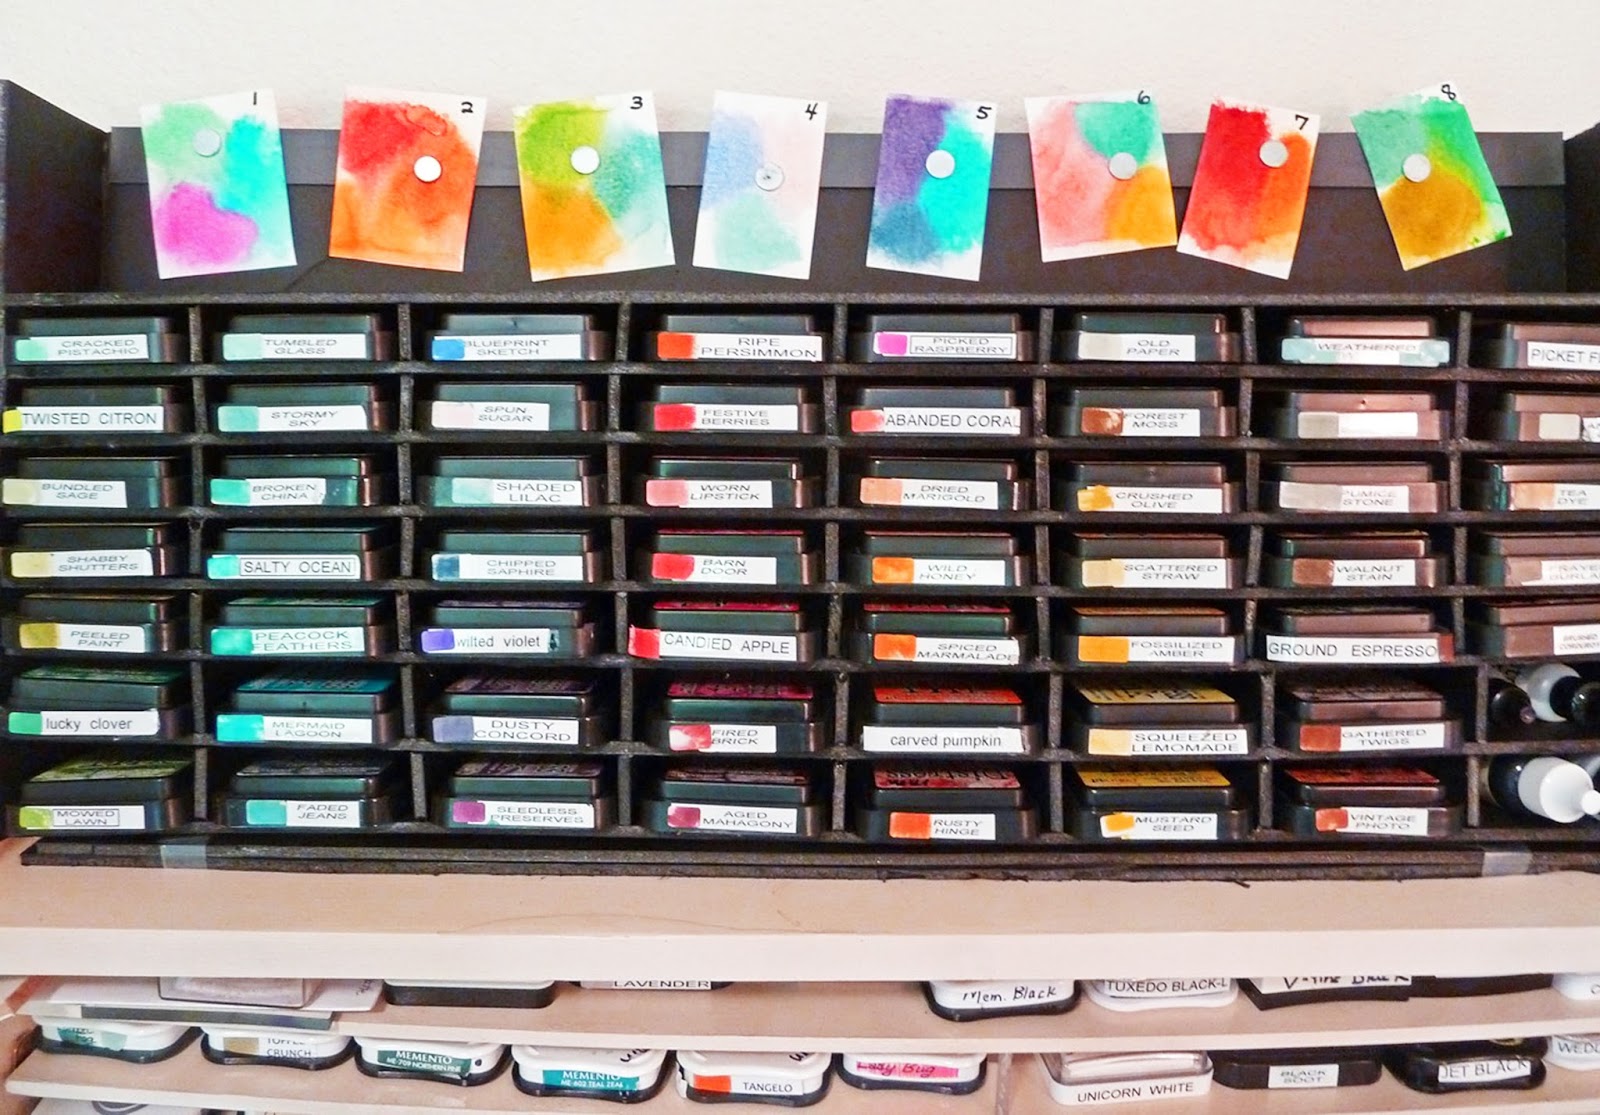
I didn’t think to take step by step
photos of my project (hindsight is SO good, right?), but the photograph shows
the finished project.
I measured my space available,
measured my Distress Ink Pads, and proceeded! I made each shelf 2-3/4”
deep so the ink pads would stick out just slightly for easy reaching or
“grabbing”.
I didn’t want the rack to be too
tall, as I wanted to be able to reach all the pads from a seated position at my
desk. I made slots for 56 Distress Ink pads, and store a few of my less
frequently used colors in another space.
The hot knife was invaluable in
cutting through the foam board very easily. I cut on top of a strong piece of
glass for the most ease in cutting. I made the shelves 26-3/4” by 2-3/4”.
The small spacers measured 7/8” by 2-3/4”. The sides were
12” by 3-1/2”, and the back panel measured 26”-3/4”. This allowed for the open
area at the top of the rack, which can hold a few of my favorite Distress Refills,
and also a display of my favorite Distress Ink color combinations.
The Process:
1. I started by cutting all the shelf
pieces.
2. Starting with the bottom shelf, I
glued on the spacers, using the hot glue gun.
3. Then, I applied hot glue to the tops
of all the spacers, and quickly pressed on the next horizontal shelf piece. I
had to work quickly to keep first glue from setting up as I worked my way
down the spacers.
4. Now it was time to glue on spacers
to the second shelf piece, again with hot glue.
5. I continued in this way with all 8
shelves. I used the ink pads to determine spacing.
6. Sometimes, I had excess hot glue
dripping down, creating “blobs” of glue. To remove them,
I used the hot knife again, trimming
(melting) any excess hot glue away.
7. After completing my eight shelves,
I glued on the side pieces and then the back piece.
8. I’ll admit there are slight
imperfections with measurements and gluing, but most of these are
hidden, and don’t interfere with the
functionality of the rack.
9. After putting my rack in
place, I put two extra narrow foam board pieces under the front edge to
help the rack tip back slightly, and further secure the pads in their slots.
10. I’m really pleased with my rack, the easy access
to so many pads that I use so often.
No comments:
Post a Comment
Thank you so much for taking the time to comment! Please visit us again soon.