Showing posts with label Distress crayons. Show all posts

Wednesday, December 14, 2016

Twelve Tags of Christmas - Thursday, December 15th - Day 11


We only have two days left in the Twelve Tags of Christmas event.  We have two more tags for you, Thursday, December 15th and Friday, December 16th.  Pam designed this tag for Thursday and it uses a technique that was previously shown on our blog.

While you are at the store to make this tag be sure to take advantage of our Twelve Days of Christmas daily promotion.  On Thursday wear blue or green (or your Seahawks shirt) and you will receive 30% off the price of any blue or green item in the store.  This promotion is limited to stock on hand.  Also for every $10 pretax you spend, you get one entry for the big grand prize drawing.  The Twelve Days of Christmas runs through Thursday, December 22nd.  Follow our blog or Facebook to see the daily promotion.

Today’s tag features Distress Crayons, the Penny Black “Elaborate” stamp (#40-489) and Tim Holtz Vintage Tidings Die set (#661605.

The tag has been cut from watercolor paper using the largest die from the Poppy Stamps Main Street Stitched Tag set (#1268.)  Use the powder tool over the entire tag, then stamp using VersaMark and the “Elaborate” stamp.  Cover the tag with Detail Gold Embossing Powder.  Heat with a heat gun.

Select two coordinating colors of Distress Crayons. The sample uses Salty Ocean and Wilted Violet.  Make several small dots of each color on the tag.  Use a baby wipe to blend the dots of crayon – do all of one color and then move to a different spot on the baby wipe and blend the other color.  Gently wipe the entire surface of the tag to remove any bits of color from the gold embossing.

The word “Noel” has been die cut from two colors of So Silk Black Style and Fashion Purple paper.  Glue the two pieces together, black on the bottom, and then glue to the front of the tag.  Punch a hole in the tag and add ribbon.

If you want to see this technique used on a card, click here to see the whole technique from our November 4th 2016 blog post.

The Art ‘n Soul staff will provide all the materials you need to make each day’s tag.  The cost to you is a donation of non-perishable food or $1 (or more if you would like) for each tag you make.  All donations go directly to the Thurston County Food Bank.  We really appreciate your support to this great community program.  We look forward to seeing you in the store this month to thank you in person.

Friday, November 4, 2016

Technique of the Week: Playing with Distress Crayons


Today’s technique uses Distress Crayons on watercolor paper.  I bought the crayons as soon as they were available last spring but unfortunately, I haven't used them very much.  I recently started trying different techniques with them and then I ran across a video by Sandy Allnock which I mentioned in last week's Technique of the Week article.  

After experimenting with the technique a bit I’ve decided that I really like it and I hope that you will like it too!  In her video, Sandy does two versions of this technique – an embossed version and another version without embossing.  I’m sharing the embossed version today because I loved the shine created by the embossing powder and I love anything with shine!  However, the directions for the version without embossing, as well as a link to her video will be at the end of this blog post.


To begin you need to select a stamp that will cover the entire front of your card.  I selected Hero Arts Garden Tile, CG667, for this project but there are also lots of other big stamps, to include Impression Obsession Cover a Card stamps that will work great for this technique.  

Cut a piece of watercolor paper slightly larger than your stamp.  Tape the paper to the inside of your MISTI, smooth side up to hold it in place.  Align your stamp on your paper then pick it up with the lid of the MISTI. Use the Embossing Powder tool to generously cover the watercolor paper with powder. Ink the stamp well with Versa Mark ink and stamp the paper.  Restamp if necessary to ensure an even stamping.  

(If you don't have a MISTI, lay your stamp on your table, rubber side up. Ink your stamp and place your watercolor paper, smooth side against the rubber. Hold it in place and use your other hand to press the paper all over so that it makes good contact with the rubber. You will not be able to do a second stamping without the MISTI). Apply a detailed embossing powder such as Judikins Detail Gold and then heat with a heat gun. 


Select a few Distress Crayons in colors that will blend well together– I used Spun Sugar, and Dried Marigold, (from set #5) and Candied Apple and Squeezed Lemonade (from set #4).  Use the crayons to put dots of color all over the paper.  You can make the dots random or put them in a pattern.  Leave white space too, as you will be blending these dots.


Once you have the colors on the paper, use a baby wipe to blend the colors.  After experimenting I realized that it works best if you blend all the dots of one color, such as Spun Sugar, first.  Use a small section of the baby wipe and a light, circular motion to blend out the color.  The baby wipes will pick up the color so move to a clean section of the wipe when you start blending the second color. 


Follow this process until all the dots have been blended.  You can add more color as desired.  Just add the color and keep blending until you have the amount of color you want. 


Be careful not to overwork the paper though.  Move to another clean section of the wipe and gently wipe the whole card to clean any bits of crayon off the embossed areas.


To finish this card I trimmed the watercolor piece to 4”x5 ½”.   I used the Penny Black die cut “A Very Merry”, #51-147, to cut a sentiment in the center of the paper.  When you remove the die cut, be sure to save all the little inside letter pieces. 


Cut a piece of Scor Tape the size of the opening and place it on the back of the watercolor paper. I also die cut the same sentiment from red mirricard paper and then placed the red die cut into the die cut opening on the watercolor paper. 


I pieced in the centers of the letters (A, R, etc.).  I cut a piece of red mirricard to 4 ¼”x5 ½” and adhered it to the front of an A2 card.  I adhered the watercolor paper to the red mirricard and then added a few sequins to finish the card.

Another alternative is to skip the embossing step.  Just stamp with Versa Fine pigment ink (rather than Versa Mark) and after it dries follow the steps above.  Versa Fine works the best because it is a great ink for detailed stamps.  You can also check out Sandy Allnock’s video here to see both versions of this technique.    

Ranger has five sets of Distress Crayons available now and they just announced they will be releasing two more sets soon.  Eventually all 60 Distress ink colors will have a matching crayon.  The crayons will also be available individually.  Please stop by Art ‘n Soul to see this card in person and to learn more about these fun crayons.  


Friday, October 21, 2016

Technique of the Week: Distress Crayon Resist

One of the interesting things about Distress Crayons is that they act as a resist. To explore this technique, I used one of the newest stencils from Magenta (coming soon!). You need a stencil that has decent sized openings for this to work well. This leaf stencil was designed by one of the Magenta Design Team members, the very talented Carole Dion. It's absolutely beautiful, and perfect for this technique.


First I cut a panel out of Neenah Solar White 80# cardstock to 3.75" x 5" (using the largest rectangle in the Lawn Fawn die set LF768 Small Stitched Rectangle Stackables).

I taped the Magenta leaf stencil (TM190) to the panel and using the Picket Fence (white) Distress crayon, I colored into all of the openings and smudged it with my finger until I was satisfied that it had covered the whole opening.

Once I had applied the white Distress Crayon into all of the leaf openings, I dried the panel with a heat gun. The resist properties of the Distress Crayons work best if the crayon has dried.


Next I started blending Distress Inks over the design. I began with Mustard Seed, and continued with Wild Honey; Spiced Marmalade; Rusty Hinge; and finally with Barn Door. As the color on the panel got progressively darker, the image showed up more and more.


I wanted a little bling, so I went over each part of the stenciled image with a clear Wink of Stella glitter pen. This lightened the image even further, and added a beautiful sparkle that is impossible to capture in a photograph.

I stamped the Thinking of You sentiment with Versafine Vintage Sepia ink and embossed it with clear embossing powder. I sprinkled droplets of water over the image to add interest. It was at this point that all was almost lost, since I dropped two very large splats of water onto the panel by mistake. Since it was 1:00 a.m. by this time, I covered the offending splats with large sequins. This is always an option!

The panel was mounted onto a mat of Stardream Bronze cardstock cut to 4" x 5.25" and all was mounted onto a base card of Neenah Solar White 110# cardstock.


This is a fun technique that you can try with Distress Crayons, and is one of the many ways to use them. 


Art 'n Soul currently has ALL of the Distress Crayon sets that are currently available (Sets 1-5) in stock.

To see additional photos of this process, please check out the Backporch blog here; and to see another great technique using Distress Crayons, please go here to another Backporch blog Technique of the Week entry.

Friday, September 16, 2016

Technique of the Week: Rainbow Beam Blending

This technique is from Laura Bassen, and it makes a quick, easy and beautiful background. 


You will use Distress blending for this technique, but you will do it through a stencil. This makes the blending so much easier. You don't have to be as careful because you will not get the splotches that you sometimes might get with regular blending.

First I die cut a panel from Neenah Solar White 80# cardstock, using the Lawn Fawn LF768 Stitched Rectangle Stackables die. I used the largest one that gives me a panel approximately 5" x 3.75".

I taped the panel to my craft sheet, and then taped down a Magenta stencil (TM-147 Stained Glass) centered on the panel. I then got two pieces of Post-it tape to use as masking.

Starting at the left bottom corner of the panel with the stencil over it, I put the two pieces of tape close together and then wider apart going up to the top right. This creates a long triangular shape like a beam of light.

To do the blending, I used three colors of Distress ink (Wilted Violet, Peacock Feathers, and Twisted Citron). I started with Twisted Citron, and working from the bottom to the top, I applied the color with a mini blending tool. This goes very fast, since you don't have to worry so much about building up your color.

I then moved the pieces of tape, allowing part of the initial color to show and some white area. I applied the next color, Peacock Feathers, and quickly blended it into the partial line of Twisted Citron that was showing. I worked across the entire card this way, moving the tape and randomly choosing another of the three colors to blend with.

When I removed the tape and the stencil at the end, the results were striking. You can do this technique with lots of different stencils and colors of ink to create a unique one layer card.

To finish the card, I stamped Happy Birthday, using Magenta's beautiful birthday stamp 07.305.G and Versamark Ink. I thought this looked like a birthday card, and this stamp fit in the opening of the Stained Glass stencil perfectly. I embossed the image with Judikins White Diamond embossing powder.

I matted the panel on So Silk Shocking Green cardstock, which goes very well with Twisted Citron Distress ink. I scattered a few sequins, and it was finished! This technique was easy and fast to do, and I hope you will give it a try. You can see more of the step by step photos on my Backporch blog here.


Other Art 'n Soul news:

Come in to Art 'n Soul this weekend and take a fabulous class with Vesta Able! Vesta will be here all weekend for 3 amazing classes! Scroll down for complete info; we still have a few spots left! When Terry Medaris was here, he had wonderful things to say about Vesta and her talent and creativity. We are so lucky to be able to have Vesta here to teach. 

Five new Nuance colors are coming soon from Magenta.  These colors are in production and they will be out very soon, and they are perfect for Fall! We will be the first store to receive these, so if you want them (and you are going to want them) be sure to put in a paid pink sheet order to reserve your set.

We got our Ranger order, and the new Distress Crayon sets are here! Beautiful colors! We also have Yupo paper and lots of the new alcohol ink colors. If you have not used alcohol ink and Yupo paper, we would love to show it to you. You can make the most beautiful backgrounds. We are also all stocked up on the new and beautiful Enamel Accents from Ranger.


Sets 4 and 5 Distress Crayons

New colors of Alcohol Ink and Yupo paper


Enamel Accents from Ranger


Friday, July 1, 2016

Technique of the Week: Distress Crayon Stenciling

Recently I've been playing with my Distress Crayons and I like the idea of using them with stencils. This technique is actually from Sally Penley, who is a recent, and very popular teacher at Art 'n Soul. When Sally was at ANS to teach a Pastel Dusting class, I asked her if she would mind trying out a similar technique that she was doing with her pastels, and try it with the Distress crayons. What she did was amazing, and honestly, I'm not sure if I did it justice,, but I do like what I ended up with.


Here is what Sally made. She just dashed this off during the class, that's how good she is. When we schedule more classes with Sally, be sure to sign up!


by Sally Penney

I used the Magenta tulip stencil TM150, the Magenta stamp 07.907.L Multilingual Happy Birthday, Magenta MNU-015 Red Nuance. I also used the Distress crayons Peeled Paint and Festive Berries. To cut my panel, I used Lawn Fawn die LF788 Small Stitched Rectangles and cut it out of Tim Holtz watercolor paper. Watercolor paper is not required for this technique, but I like the texture of it. To cut the strip for the sentiment, I used MFT Die 463 Blueprints 13. 


I taped my panel down to my work surface, and taped the Magenta stencil in place over it, using painter's tape. I used the Distress crayons to color onto the stencil and panel both, and I used my finger to pull the color into the open areas of the panel. Sally's favorite tool for this would be a Viva paper towel, but since I didn't have one, I resorted to using my fingers. If you try this, only work a small area at a time, and try not to get very big blobs of the crayon on your stencil or card.


After pulling Festive Berries color into all the petal areas of the tulip, I used the Peeled Paint to color the leaves and stems. I then colored the petals and leaves with clear Wink of Stella glitter pen, and I decided I wanted speckles over the top. I mixed some Red Nuance with pearly water, and flicked it over the card.


To finish, I cut a small piece of black cardstock using one of the small dies from Blueprints 13 from MFT. The die was actually a little longer than I wanted, so I measured the sentiment, and pulled one end of the strip past the edge of the die and cut it again, ending up with a deckled edge on each end of my shortened strip. 

This photo shows my stamp on top of the black paper to measure how long I wanted it to be. After removing the stamp, I cut the paper for a second time to shorten it.

I then chose the top line of the Magenta Multilingual Happy Birthday stamp, and stamped it onto my black strip with Versamark ink, using my mini MISTI tool. I embossed it with JudiKins White Diamond embossing powder, and added an exclamation mark with a white gel pen. The sentiment was popped up with foam tape, and the panel was matted with Stardream Jupiter cardstock. I scattered a few sequins on the finished card.

I found this technique easy and fun to do. I hope you will give it a try! For a more complete list of materials, please visit my Backporch blog post here.


Monday, March 28, 2016

Earth Arts at Art 'n Soul!

We are so pleased and excited to welcome an Earth Arts trunk show at Art 'n Soul on Saturday, April 9th. There will be beautiful Earth Arts coloring books and stamps available for purchase, and Gwen Evans will here from 11:00 a.m. to 3:00 p.m. to offer beautiful make and takes and answer any questions you may have.

We have some of the coloring books at Art 'n Soul already for you to look at, and they are gorgeous! The images are enlarged for easier coloring, and they are printed on very nice 80# paper, one sided. (sales of Earth Arts coloring books are final).

We also have an Earth Arts catalog for you to view the stamps and make your list (or you can pre-order the stamps on a pink sheet order, and Gwen will be sure to have those with her on the 9th).

Gwen left us some fabulous sample cards she has made so you can see ways to use the beautiful Earth Arts stamps. Marj and Pam have also gotten into the spirit and made some amazing cards to inspire you. Pam's card will appear in a future technique post, but below are some of the cards from Gwen and Marj.

Marj's sign for our front door
Earth Arts Roadrunner


Earth Arts Tree of Life card by Marj Marion


Earth Arts Elephant card by Marj Marion
Serengeti Sunset card was made using Distress crayons and the beautiful Earth Arts Elephant. The corners were stamped with the Magenta Mini Corner 14.196.B.


Earth Arts Octopus card by Gwen Evans
This card by Gwen is just stunning in real life. The background was done with Distress ink


Earth Arts Sea Turtle card by Gwen Evans
I'm not gonna lie, this card by Gwen is beautiful in real life, and my photo does not do it justice. In real life, it has rounded corners, and is lined with gold.


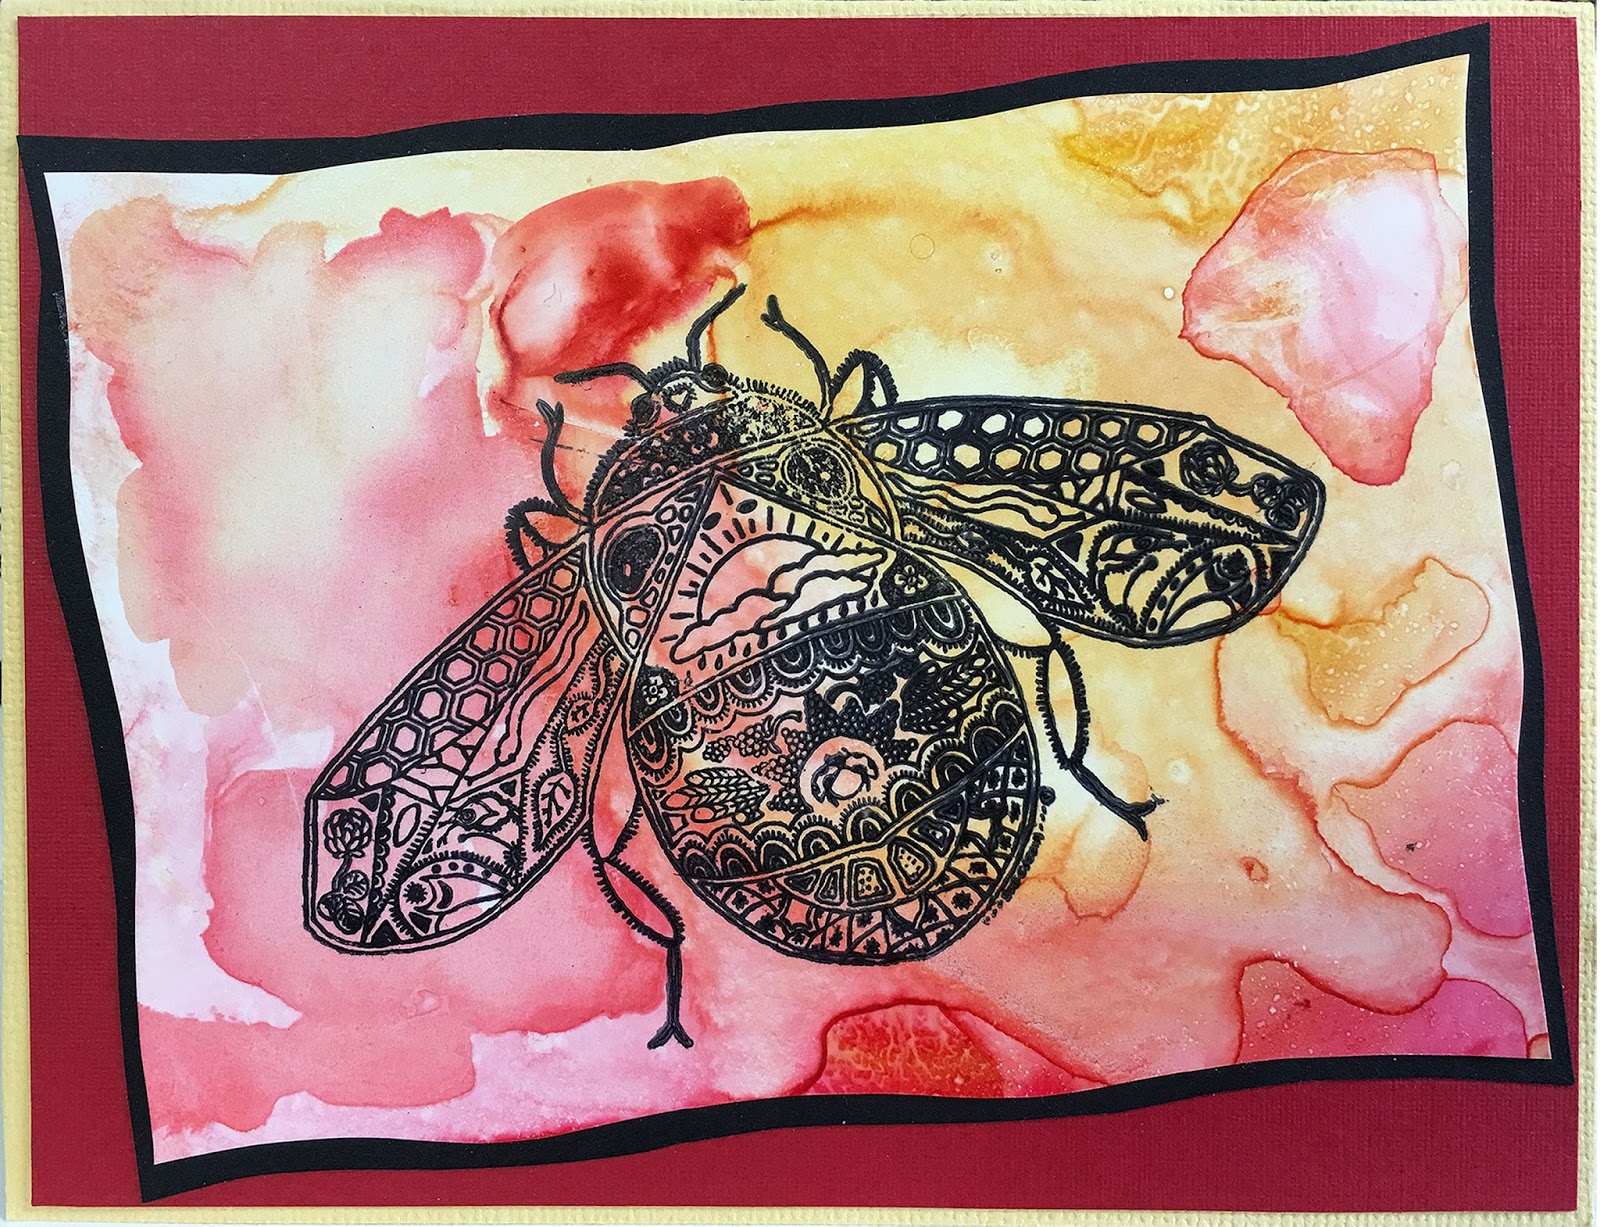
Earth Arts Bee card by Marj Marion

This amazing Bee card by Marj is watercolored on Yupo paper, and the Bee is stamped with black Archival ink. I love how it was cut unevenly, which just adds to the gorgeous watery look of the background.


Earth Arts Wolf Standing card by Gwen Evans
I don't have the details on how this amazing card was made, but you can ask Gwen herself at Art 'n Soul on Saturday, April 9th. Gwen will be at Art 'n Soul from 11:00 a.m. to 3:00 p.m. doing make and takes and answering your questions.


Earth Arts Elephant by Marj Marion
Marj made this lovely card using the Spellbinders Modern Stationery die, and Distress ink.


Earth Arts Seahorse card by Gwen Evans
Beautiful card by Gwen using the Seahorse stamp and background is Distress inks


Earth Arts Crab card by Gwen Evans


Earth Arts Lovebirds card by Marj Marion

We hope these cards will inspire you! Please come to our trunk show event on Saturday April 9th. The trunk show will be at Art 'n Soul all day, and for a few days afterward, but the make and takes with Gwen will only be from 11:00 a.m. through 3:00 p.m. on Saturday.