 |
| I made this one for a friend's birthday |
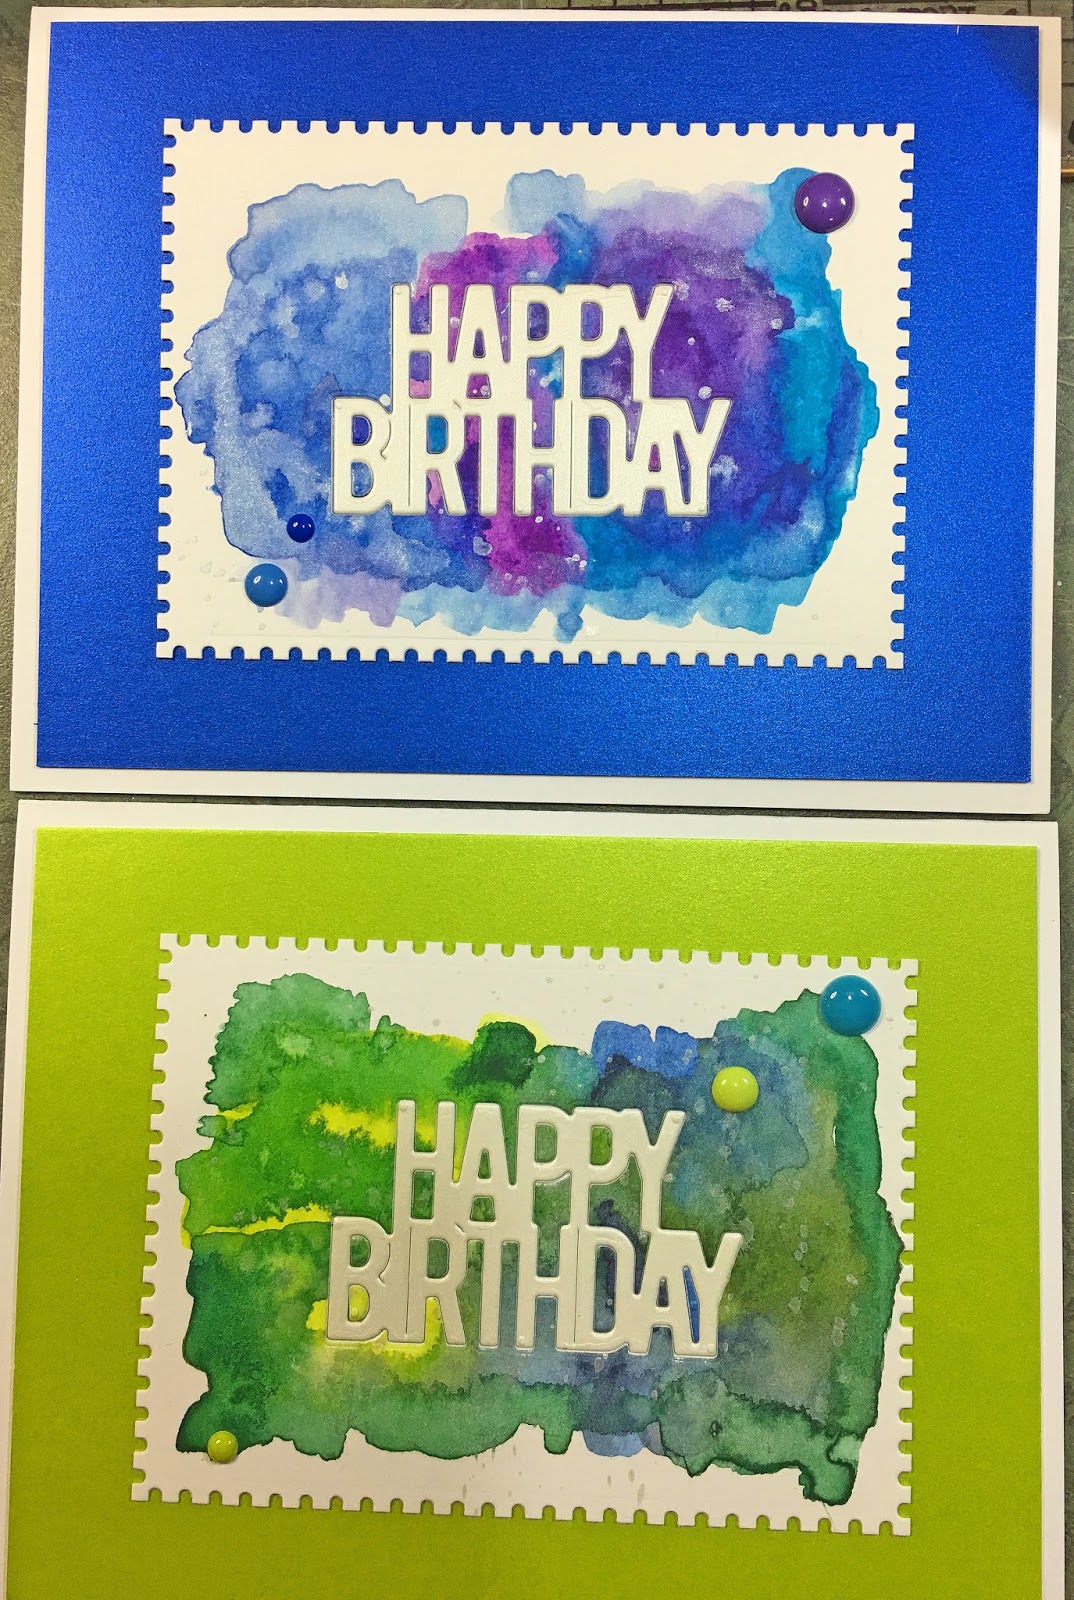
I pulled out some dies from my stash and realized that I could probably make some nice cards pretty quickly. To start, I used some watercolors to paint blobs of color onto some Tim Holtz watercolor paper. You can use any watercolor for this step, and Nuance would also work fabulously well.

My intent was to just get some color on the paper. I did about 6 of these total and they went very fast (I needed one card for a friend of mine's birthday as well). Since they were not large, they dried pretty quickly.
I die cut each panel using the Memory Box Postage Rectangle Layers die set 30052.
 |
| This photo shows the inlays already in on most of the cards. Sorry, I didn't know at the time that I would use this for a Technique of the Week! The orange panel in the center still has not had the inlay done. |
For the next step, I die cut the sentiment "Happy Birthday" out of the center of each panel using two Savvy dies, Happy Birthday Stacked #10227, and Happy Birthday #10221. I also used these dies to cut out of white cardstock for each of the cards. This was to create the inlay.
Next, I turned each panel over and applied 1" scor tape to cover the open areas (where the Happy Birthday sentiments had been cut out).
Turning the panels over, each open die-cut Happy Birthday had sticky tape showing through, which made it very easy to lay in the white die cut sentiments.

All of the panels were mounted onto coordinating colors of cardstock cut to 4" x 5.25" (from top So Silk Beauty Pink, So Silk Purple, So Silk Fair Blue and So Silk Shocking Green), and those were mounted onto base cards of Neenah Solar White 110# cardstock.
Since I still had the positive sentiment images that I had cut out of the center of each of the watercolored panels, I decided to use those on panels that I had saved from other projects. In all, I was able to make 10 birthday cards to send to my sister, and one for my friend. I still have one extra watercolored sentiment to use on a future card.

Sorry for the less than stellar photography, but I had taken these quickly with my phone, and they are all mailed away! For this card, I had a panel that was one of many I made in a previous Technique of the Week on "Stencil Kissing". (To see that technique, please visit my blog post here.) The stamp I used is Magenta 0685.O Bird and Branch Silhouette (in stock at Art 'n Soul). I applied the positive Happy Birthday image to the bottom of it and matted it with Stardream Flame. I added a few Enamel dots and presto, it's a card.

The top card in the above photo was a card that I made in an Inchie Arts class with Lisa Lee. We had stamped the rose image onto some inches, and then separated them and mounted them onto a pink rectangle for a beautiful effect. I added the dark pink positive Happy Birthday image to the bottom and some enamel dots to finish it up.
For the second card in the above image, I found a watercolor panel on which I had used the Acrylic Block Stamping technique. To revisit that technique, please visit my blog here. I die-cut the panel using the Poppy die Massa Leaf Frame 1021. I glued the colorful die-cut directly onto a base card and adhered the positive happy birthday die-cut onto the center of the square. I added a few enamel dots and it was finished.

For the card on the left, I had a Stencil Stamping technique panel left over from another project where I had cut a circle out of the center. To revisit the Stencil Stamping technique, please visit my blog here. I mounted the panel onto a Curious Metallics Super Gold piece cut to 4" x 5.25" and adhered the positive happy birthday die-cut to the center. I applied a few enamel dots to finish the card.
The card on the right is a Nuance panel in various blues. I die-cut an Impression Obsession die, Out to Sea 51-225 out of white cardstock (backed with Stick-it adhesive) and applied it to the Nuance panel. I added the orange happy birthday die-cut to it and adhered a few enamel dots.
I think these cards would work for ladies or for guys, so I was hoping they would be versatile for her.
For her present, I included all of the cards with envelopes in a zipper pouch, and added a nice pen and some stamps. She was thrilled to receive it, and it was fun for me to make. This project would work well for Thank You notes also!
I also wanted to let you all know, in case you have not already seen this elsewhere that we had a drawing for a prize basket of fabulous products, and our winner is Sandy Lien!!

Congrats to Sandy, and thank you for everyone who participated!
One last thing to tell you about: we have slightly revised our rules for those bringing things in for Recycled Rubber sales. Due to our ever-rising costs, we are having to increase the amount of our commission on RR sales to 15%. Thanks for your understanding, and for a copy of our Recycled Rubber rules, you can click on the link at the top right of this blog.
No comments:
Post a Comment
Thank you so much for taking the time to comment! Please visit us again soon.