Showing posts with label Distress Oxide inks. Show all posts

Thursday, July 20, 2017

Technique of the Week: Acrylic Block Stamping Revisited by Pam Nelson


This week’s technique revisits an old favorite – applying inks to acrylic blocks and then stamping on watercolor paper.  I was inspired to try this when I saw Jennifer McGuire’s idea which you can see at her blog here.

Since I’ve started using my MISTI (and hopefully soon, the Tim Holtz stamping platform!), I don’t use my acrylic blocks very often.  This technique seemed like the perfect reason to start using them again.

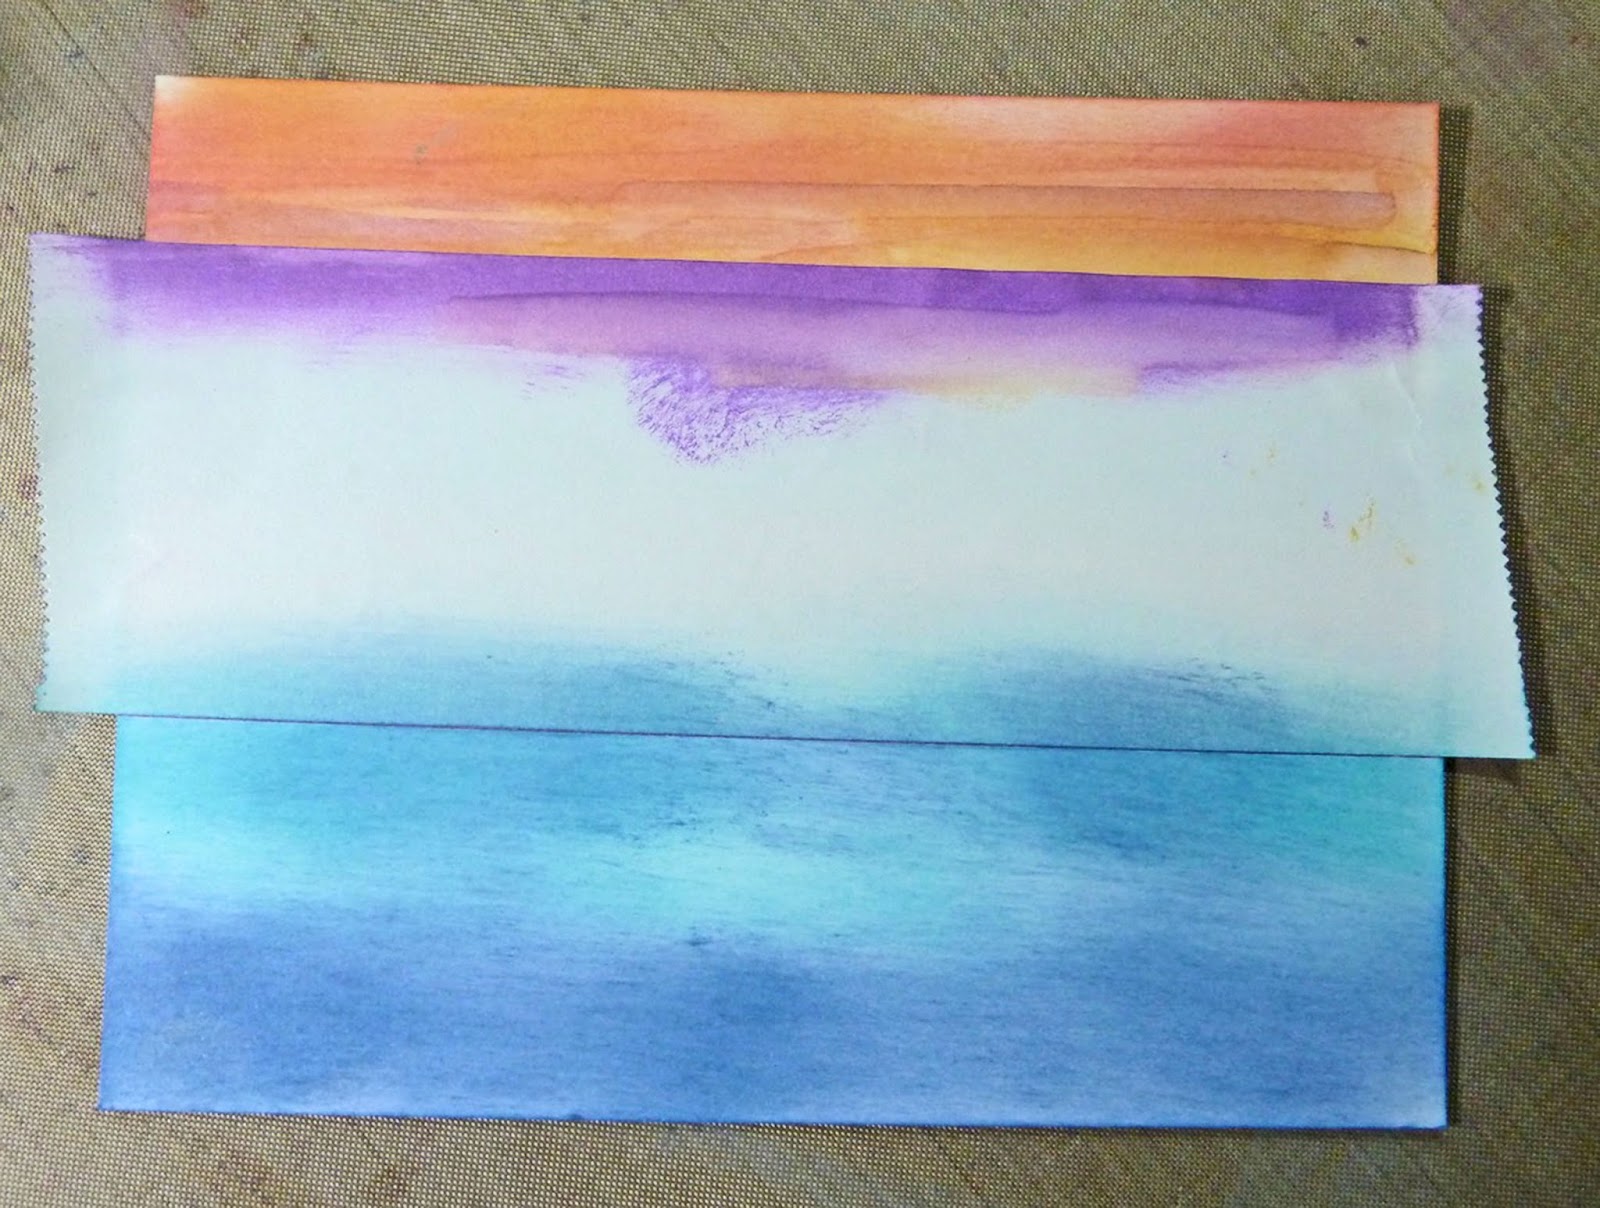
As you will see in Jennifer McGuire’s post, this technique will work with any water-soluble ink.  I tried it first with regular Distress Inks and really liked the results.  Then I decided to try it with the new Oxide Inks and the fun really began!  I discovered that I really liked using my larger acrylic blocks which enabled me to make background pieces so that is what I’m showing you today.

I started by cutting a piece of watercolor paper to 4 ¼” by 5 ½” and placing it smooth side up on my craft mat.  I selected the 5” x 6 ½” block from the Tim Holtz Acrylic Stamping Grid Blocks set because by using a block that was larger that my piece of watercolor paper I wouldn’t have any border lines on my finished piece. 


I randomly applied four different colors of Oxide inks – Worn Lipstick, Wilted Violt, Broken China and Cracked Pistachio to the acrylic block by swiping the inkpad directly onto the smooth side of the block.  


I sprayed it liberally with water, turned it over and centered it over the piece of watercolor paper.  Note:  you can use the smooth or textured side of the paper.  I used the smooth side because I planned to stamp on the finished piece.  You can also get a fun background by applying the ink to the grid side of the acrylic block.

Use your fingers to apply pressure to the acrylic block to move the colors around.  This creates some fun blends and patterns.  Place something heavy, like a paperweight or jar, on top of the block and let it set for about five minutes to allow the paper to absorb the colors.  The amount of blending you achieve is determined by the amount of water you use – I played around with several different pieces of paper, using different color combinations and amounts of water. 

One word here about color choices.  You want to be mindful of the color wheel because you can muddy your colors by placing complementary colors (colors that are opposite each other on the color wheel) side by side in this technique.  For example, putting a color in the red family next to a color in the green family will create a “muddy” result. 


Lift the acrylic block from the paper and use a paper towel to dab up any puddles of water.  Set aside to dry, or use a heat gun to dry your paper.


After you remove the acrylic block from the paper there will still be ink on the block.  You can spray this again and place it on another piece of paper.  The end result will be lighter since there is less ink on the block, but the results are equally beautiful.


To finish up my card, I cut the background piece to 4” x 5 ¼”.  I stamped this fun Penny Black sentiment, “365 Days” (3944H) in the lower right corner with Black VersaFine Ink then embossed it with clear embossing powder to make it stand out.  I die cut the upper left corner using the Poppy Stamps “Atessa Collage” (1805). 


I adhered a piece of 4 ¼” x 5 ½” So Silk Glamour Green paper to the front of an A2 card.  I wanted to give the card some dimension so I placed several strips of foam tape on the back of the watercolor piece, trimming some to fit around the edges.  I adhered that to the front of the card, and applied some sequins.  For the last step I put a drop of Nuvo White Blizzard in the center of each sequin for a bit of sparkle.

This technique is really fun!  I created several pieces of background paper while “playing” with this technique.  Now I have pieces that will be great for stamping and die cutting.  I hope you will give it a try.  You can see the completed card at Art ‘n Soul.  


I created this card using regular Distress Inks for the background (Spun Sugar, Shaded Lilac, Tumbled Glass, Squeezed Lemonade, Dried Marigold and Shabby Shutters), plus a the Poppy Stamp Ragged Daisy Die (#1842), Memory Box Pinpoint Double Frame (99765) and Memory Box stamp Birthday Sentiments (CL5211).


I created these pieces with colors from the second release of Distress Oxide colors.  I’d already completed this week's card when the inks arrived but I couldn’t wait to play with them. 

We’ll be doing another order of all 24 of the Oxide ink colors so if you haven’t purchased any of these wonderful inks yet, stop by the store.  We’d love to show you why everyone is crazy about this latest Tim Holtz product.  

Friday, June 30, 2017

Technique of the Week: "Soft Summer Skies" by Marj Marion

The Distress Oxide Inks are such fun, so I decided to create a Summery card with them for this week’s technique. We all can’t wait for the next twelve colors of Oxide Ink to arrive!  The supplies I used for this project are underlined in the following description of my technique.


I began with a smooth, good quality white panel cut to a 4.25" by 5.5" rectangle. I adhered a strip of 2" wide Post-it Removable Labeling Tape, and pressed the tape on the panel so I had 2 3/4" of white card stock revealed at the top section of the panel

Then, I used small Finger Daubers to sponge on Oxide inks as follows: right above the removable tape, I sponged on Wilted Violet, then Fired Brick, followed by Worn Lipstick.  


Then I sponged on more Wilted Violet, then Fossilized Amber Oxide inks.  I used a light touch and left some areas of the white panel showing to create more visual interest.


Next, I used a round watercolor brush (medium size), dipped it in water, brushed off the excess water, and with a light touch, painted streaks across my sunset colors.  I used the brush in different areas without rinsing it to mix up the colors a bit. I love how the colors blended, and the textures ranged from “brushy and spongy” to “streaky”…just like a real evening summer sky. Oxide inks are gorgeous on their own, and you can create many different textural effects by adding water in a variety of ways.

I let my sky colors dry thoroughly; (let air dry, or hurry it along with a Heat-it Tool and then I carefully removed the tape, and saved it for the next step. (If you don’t have a Heat-it Tool, you will want one! It has a softer heat than a regular Embossing Gun, and is great for drying paper without warping it.  I use it all the time when working on watercolor paper, and it’s great for Shrink Plastic, and much more.)

I carefully pulled off the tape, turned the tape upside down and applied the the wide Removable tape so the lower area on the card was revealed. 

I sponged on Oxide Faded Jeans and Oxide Broken China for my lake colors, mixing them about on the lower part of the panel. I varied the pressure I used on the finger dauber so there would be “lights and darks” in my coloring. 

Then, the fun part…..carefully removing the tape to reveal my creation!
Next, I stamped Magenta Cling 0677-N,  Branch at different heights and angles to create interest in the lower part of the card. 

I used Wilted violet Oxide ink….isn’t fun when we artists can make our branches Violet if we want to?!

Sometimes we can see the moon in the early evening, before it is quite dark.  We’ve all had fun this past year using circle masks on some of our scenery cards.  I haven’t ever found a crescent moon stamp or stencil, so I set about to make one.  I sort of discovered it by accident when cutting some acetate to create positive and negative round circle masks and stencils. On my desk, one of the positive circle masks slipped over the negative stencil circle area, and I quickly noticed a space that was a crescent moon shape!  Voila!

On this photo,(with acetate pieces against black paper for better visibility) you can see how I arranged the acetate mask and stencil to reveal a crescent moon shape. 

The strip of Washi Tape held the positive circle mask in the right position over the negative circle stencil, and more Washi Tape held the entire piece of acetate on the card so it didn't shift.  I pounced Hero Arts Unicorn White ink through my hand-made crescent moon stencil. After it dried, I applied another layer of the same ink which made the image a little darker. 

Next, I carefully removed the stencil and let the white ink dry thoroughly.  I also stamped Magenta 07.614 D “Beauty is Everywhere” in the left area of the panel, using Black Versafine ink.

Lastly, I wrapped some White, Silk 1/4” ribbon by May Arts around my panel on the left hand side, tied it in a small bow, and adhered the panel to a So Silk Purple card stock panel.  I trimmed the purple panel to a create a 1/16” border, and then mounted my project on a folded white card.

Art ’n Soul has many beautiful colors of May Arts 1/4” Silk Ribbon in stock. I love this gorgeous ribbon because you can tie a bow with on a card without adding very much bulk. We also have the Hero Arts Unicorn White ink back in stock. If you don't have this great white ink, you should acquire some!

I hope you enjoy this technique, and remember, we love to see your projects inspired by our weekly technique!

What's New at Art n' Soul:

This weekend is Recycled Rubber weekend! We have gotten in SO much amazing stuff and some staff have been cleaning out again. DON'T miss it! And we have AC, so come in and be cool and have some fun! Saturday 10:00 a.m. - 5:00 p.m. and Sunday 12:30 p.m. - 5:00 p.m.

We recently got in an order from our distributor, and we are restocked on lots of things, including Nuvo drops.

Our Memory Box order is due in this afternoon and will be ready for you to look at and purchase just in time for Recycled Rubber! If you have made a paid pre-order you will receive a call.

We have ordered the new 12 Oxide inks from Ranger. We are in line with lots of other people, so we don't know when we will receive it, although shipping is scheduled to start just after the holiday. Fingers crossed that we will receive it early!

Thursday, June 22, 2017

Technique of the Week: Double Embossing

As you all may know, there are two main kinds of embossing that we do. One is "dry embossing", where you emboss the paper with either a stencil or embossing folder, using a die cut machine or an embossing stylus. The other is heat embossing, where you apply powder to ink on your paper and heat it until it melts. For this technique, we are doing both kinds!


RUBBER MAT
Before I get into the technique, I want to talk about rubber mats. To emboss a stencil or die using your die cut machine (Big Shot or Cuttlebug) you need a rubber mat. In this technique I used a regular rubber mat (Spellbinders tan mat) and had to shim with 5 pieces of cardstock to get it to make an adequate impression. Lynell Harlow, who pioneered this technique, developed a thicker mat to use, that works much better. Art 'n Soul is going to try to obtain some of these mats from Stampendous. Lynell has said that Stampendous has some in stock, but it's uncertain whether they will continue to carry it. We plan to try to get them in before Lynell's classes in August (which you should not miss; please scroll down for details) Please order one of these mats from Art 'n Soul if you want one, because they may not be available indefinitely.

Now for this technique: I should say that I learned this from Lynell Harlow, and it's not only beautiful, but it's fun to do. My way is slightly different from Lynell's, but both work.


I chose the Magenta Triangles stencil (TM-221) for this technique. I cut a panel of 80# Neenah Solar White cardstock to 3.75" x 5", using the Lawn Fawn LF-768 Small Stitched Rectangle Stackables die. I taped the panel to the back of the stencil and embossed it in my Big Shot machine.

Every machine is different, and you may have to figure out the appropriate sandwich for your machine. For mine, I opened Tab 1 (you should set up your machine the way you would to emboss with an embossing folder) and I put down a metal shim, my rubber mat, 5 pieces of shim cardstock, my stencil with the panel taped to it, and both cutting plates.

Once my panel was dry embossed, I added color using a mini blender and Distress Oxide inks in Wilted Violet, Broken China, and Cracked Pistachio. (The panel was still taped to the stencil at this point).

If you move quickly with this process, you can remove the stencil and add your embossing powder to your panel, since Oxide inks are a fusion of dye and pigment inks and can be heat embossed. Unfortunately, since I did not move quickly enough, the bottom of my panel had dried. I replaced the stencil and added Versamark ink with a mini blending tool and added clear embossing powder over the panel. 

Once the panel was heat set, I decided to add another coat of clear embossing, so I placed the stencil again and added more Versamark ink, then more clear embossing powder. Placing the stencil is very easy at this point, because the triangles and squares have become raised up by the double embossing.

Once I had the second layer of embossing done, I absolutely loved the look of the shiny and bright triangles and squares!

I cut a strip of the panel, matted it in So Silk Glamour Green cardstock, and adhered it to my base card of Neenah Solar White 110# cardstock.


I then die cut "Thank You" out of glossy black cardstock, using the Hero Arts Fancy Thank You die DI080.

I sprinkled a few sequins at the end, and I still have half a panel to make another card. I hope you try this beautiful technique! Come in and see the card at the shop, it is so cool in real life. If this technique appeals to you, please check out Lynell Harlow's 4 new incredible stencil classes. If you would like to see step by step pictures of this technique, please click over to my Backporch Blog here.

Products Used:
Magenta TM221 Triangles Stencil
Distress Oxide inks: Wilted Violet,
Broken China, Cracked Pistachio
Versamark ink
JudiKins clear detail embossing powder
Lawn Fawn LF768 Small Stitched Rectangle Stackables
Hero Arts DI080 Fancy Thank You
Glossy black cardstock
So Silk Glamour Green cardstock

Neenah Solar White 80# & 110# cardstock

Great News!
Our Memory Box/Poppy order has been sent, and now we just have to wait for it to come in. 

Our order from our distributor is due in on Wednesday, June 28, and we already received our order from Imagine Crafts, which means more of the empty Pico bottles; Pico embellishers and blue craft mats.

If you did not receive our latest email, you can view it here. Please be sure to check out all of our great classes.

Friday, June 9, 2017

Technique of the Week: Fun Ideas with Oxide Inks by Pam Nelson


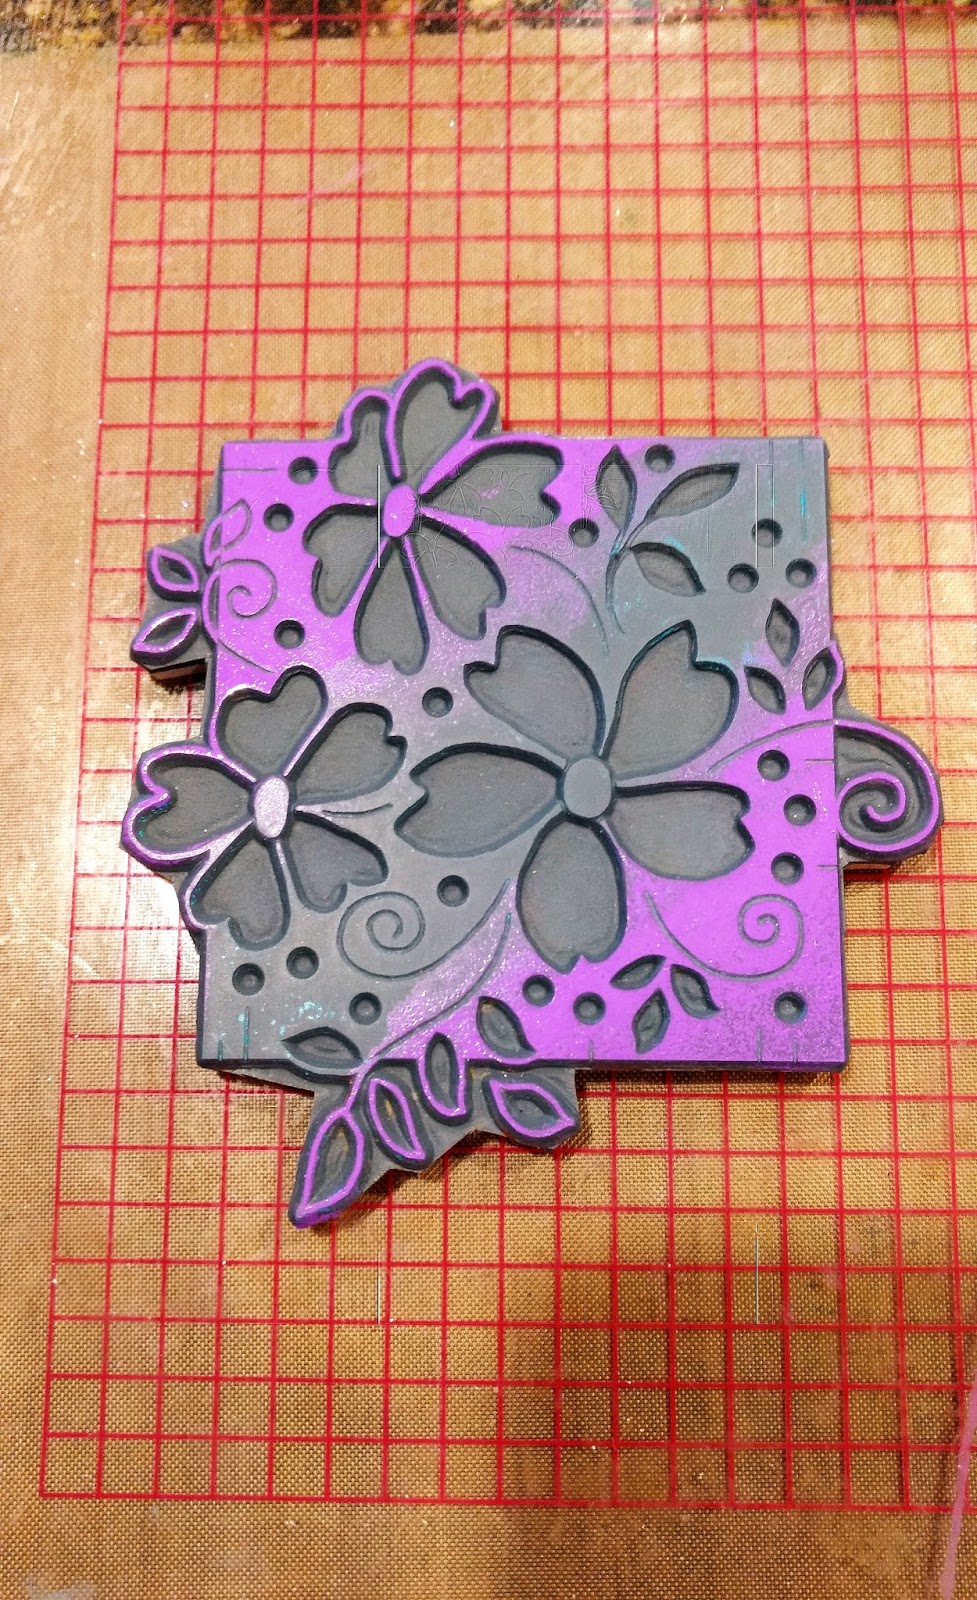
This week’s Technique of the Week features another way to use our favorite new product, Distress Oxide Inks.  Since these inks are a fusion of dye and pigment ink, I wanted to see how well they would work with embossing powders.  I love the “Blossom Square” stamp (14.657.P) from Magenta’s latest release but I haven’t had a chance to use it yet. I also love the combination of Broken China and Wilted Violet Oxide inks so I decided to try those colors with this stamp along with some Judikins Iridescent Sparkle Embossing Powder.


To start, place a piece of 110# Neenah Solar White Cardstock cut to 4” x 5 ½ in your MISTI.  Line up the stamp on your card and then close the door of the MISTI to pick up the stamp.  Ink the middle section of the stamp, from the bottom left corner to the top right corner, with Distress Oxide Broken China.  Use kind of a back and forth motion when applying the ink as you don’t want a hard, straight line on your stamp.  


Stamp the cardstock and if necessary, repeat so that you have a smooth application of color.  


Clean the stamp and apply Distress Oxide Wilted Violet to the corners of the stamp that weren’t inked with the first color (it’s okay if the colors overlap a bit because they will blend beautifully.)  Repeat if necessary.  


Cover the image with Judikins Iridescent Sparkle Embossing Powder and heat set.  Due to the pigment component of the Oxide Ink, the image stayed wet through applying both colors of ink and the embossing powder stuck to the ink very well.

If you don’t have a MISTI, try applying both colors of ink to your stamp and then stamping.  Just be sure to get a good application of ink on your stamp.

The next step is to color in the petals of the flowers and the leaves.  I tried this technique with a with a variety of papers – white cardstock, watercolor paper and Kraft paper – and a variety of techniques – color pencils, watercolor with Tombow markers and Copic markers.  I even tried Zentangling!  My favorite turned out to be the Copic markers and it was the fastest, too so that is the process I’m sharing today. 


I wanted the flowers to really pop so picked colors that contrasted with the blue and violet inks.  The Copic colors I used are R29, Lipstick Red; Y06, Yellow; Y08, Acid Yellow; YG06, Yellowish Green; YG09, Lettuce Green; YR02, Light Orange; YR07, Cadium Orange and YR68, Orange.


I colored the flower petals, leaves and accent dots and used one of the green shades to color in the stem lines.  I don’t use my Copic markers a lot and you will see by the final card that I’m definitely not an expert with them.  For the flower petals I started with the lightest color, added the next darker color, then used the light color to blend.  Next I added the darkest color and used the medium color to blend.  I definitely could have blended the largest flower a bit more but after doing this technique and being reminded of the brilliant colors you can achieve so easily, I will definitely be using Copic markers more often.


Once I finished coloring I covered the stems, flower petals and accent dots with glossy accents and set aside to dry.  On some of the other stamped images I used another one of our favorite new products, Nuvo drops, as accents.  The Nuvo drops added a very glossy finish as well.


After the Glossy Accents dried, I stamped the Magenta sentiment “Kindness is a renewable resource”  (07.939.G).  I decided to use both colors of ink on the sentiment as well so I first inked approximately half of the the stamp with Distress Oxide Broken China and stamped.  Then I inked the other half of the stamp with Distress Oxide Wilted Violet and stamped.  I embossed the sentiment with Judkins Iridescent Sparkle Embossing Powder.

To finish the card I cut a piece of light green cardstock to 4 ¼” x 5 ½” and then inked about 1” down the long edge with VersaMark ink.  I covered the ink with Iridescent Sparkle Embossing Powder and heat set.  I adhered it to the front of an A2 white card and then adhered the stamped image to far right side of the card, leaving the embossed edge of the green paper visible.

This week's card is on display at Art 'n Soul.  We also have a good selection of the Distress Oxide inks and Nuvo Drops in stock so we hope you will stop by soon and check out our newest products.

The following cards all use the same stamp, inks and embossing powders but they were stamped on different types of paper and colored differently

 Stamped on Kraft paper.
Colored with Prismacolor Pencils. Glossy accents
were used on the flower petals and leaves;
Nuvo drops were used on the accent dots
on the stamp and by the sentiment.  
 
Stamped on watercolor paper.
Watercolored using Tombow Markers.  Nuvo drops
(Limoncellow, Key Lime, Orange Marmalade),on the
flowers, leaves and accent drops.  Nuvo drops
on the flowers won't be smooth and may crack,
as they dry, adding extra interest

Stamped on Kraft Paper.
Glossy Accents were applied over the
petals, leaves and accent dots


Stamped on watercolor paper.  Watercolored
with Tombow markers.  Wink of Stella on
flower petals and leaves; Nuvo drops on
accent dots.
(Work in progress.)  Stamped on Kraft paper.
Zentangle added to leaves and flower
petals then covered with Glossy Accents.


The Journal Club will meet today (Friday, June 9th) from 4:00 p.m. - 6:00 p.m. Everyone is welcome! Bring something you are working on, or just come and be inspired. It's free and it's always fun.

Beginning Friday, June 9th, through Saturday, June 17th, we are having an open catalog for Memory Box and Poppy.  Everything in their catalog will be 10% during this event.  If you have a full card it will also be a great time to use that 15% discount.  (We are sorry, but you can’t combine the two offers.)  This is a great time to get those dies or stamps you have been wanting.  

We just got in an order of MISTI Creative Corners! If you want one, hurry in, because they are going fast. If you have not seen these in action, click here for a video about how to use this cool accessory to the MISTI.

Our Stampendous order has just been shipped to us and we should receive it soon. This will include some Dreamweaver stencils, stencil paste and FX powders.

Terry Medaris will be here this Saturday to teach his not to be missed classes on using Prismacolor pencils. The beginner class is full, but if you have ever taken the beginner class from Terry before, you can still take his intermediate class, where you will stamp and color a tile, a domino, a piece of shrink plastic, and for the first time in this class, you also can make a beautiful pendant. TERRY IS ALSO BRINGING A TRUNK SHOW OF HIS FABULOUS STAMPS AND OTHER ITEMS, AND THE TRUNK SHOW IS OPEN TO EVERYONE.

At the top right of our blog page, there are links to our archived Newsletters and our calendar. We have now added a link to the latest email; so if you do not receive our emails, please click the link and check it out. We have lots more information in our Newsletter about all of our classes coming up, including a great mini class (make and take) from Dianne on June 17th from 1:00-4:00, using alcohol inks with Yupo paper. You don't want to miss it! 

Scroll all the way down in our Newsletter, and we have a sample photo for each class offered, and we have some amazing classes listed, through August, including Lost Coast class and Trunk Show, Inking techniques with the MISTI with Marj, Dutch Magenta DT member Mariëtte van Leeuwin with some gorgeous cards and new techniques with Nuance, Rubbermoon with some new classes, and Sally Penley's Mini Masterpieces with a Christmas flair. You do not want to miss any of these!

You can also find our classes on our Calendar link. Come in and see us to see for yourself what is new, and take a look at the class samples. We would love to see you and if there is a technique that you would like us to demo for you, please ask!