The Distress Oxide Inks are such fun, so I decided to create a Summery card with them for this week’s technique. We all can’t wait for the next twelve colors of Oxide Ink to arrive! The supplies I used for this project are underlined in the following description of my technique.

I began with a smooth, good quality white panel cut to a 4.25" by 5.5" rectangle. I adhered a strip of 2" wide Post-it Removable Labeling Tape, and pressed the tape on the panel so I had 2 3/4" of white card stock revealed at the top section of the panel

I began with a smooth, good quality white panel cut to a 4.25" by 5.5" rectangle. I adhered a strip of 2" wide Post-it Removable Labeling Tape, and pressed the tape on the panel so I had 2 3/4" of white card stock revealed at the top section of the panel

Then, I used small Finger Daubers to sponge on Oxide inks as follows: right above the removable tape, I sponged on Wilted Violet, then Fired Brick, followed by Worn Lipstick.

Then I sponged on more Wilted Violet, then Fossilized Amber Oxide inks. I used a light touch and left some areas of the white panel showing to create more visual interest.

Next, I used a round watercolor brush (medium size), dipped it in water, brushed off the excess water, and with a light touch, painted streaks across my sunset colors. I used the brush in different areas without rinsing it to mix up the colors a bit. I love how the colors blended, and the textures ranged from “brushy and spongy” to “streaky”…just like a real evening summer sky. Oxide inks are gorgeous on their own, and you can create many different textural effects by adding water in a variety of ways.
I let my sky colors dry thoroughly; (let air dry, or hurry it along with a Heat-it Tool and then I carefully removed the tape, and saved it for the next step. (If you don’t have a Heat-it Tool, you will want one! It has a softer heat than a regular Embossing Gun, and is great for drying paper without warping it. I use it all the time when working on watercolor paper, and it’s great for Shrink Plastic, and much more.)

I carefully pulled off the tape, turned the tape upside down and applied the the wide Removable tape so the lower area on the card was revealed.

I sponged on Oxide Faded Jeans and Oxide Broken China for my lake colors, mixing them about on the lower part of the panel. I varied the pressure I used on the finger dauber so there would be “lights and darks” in my coloring.
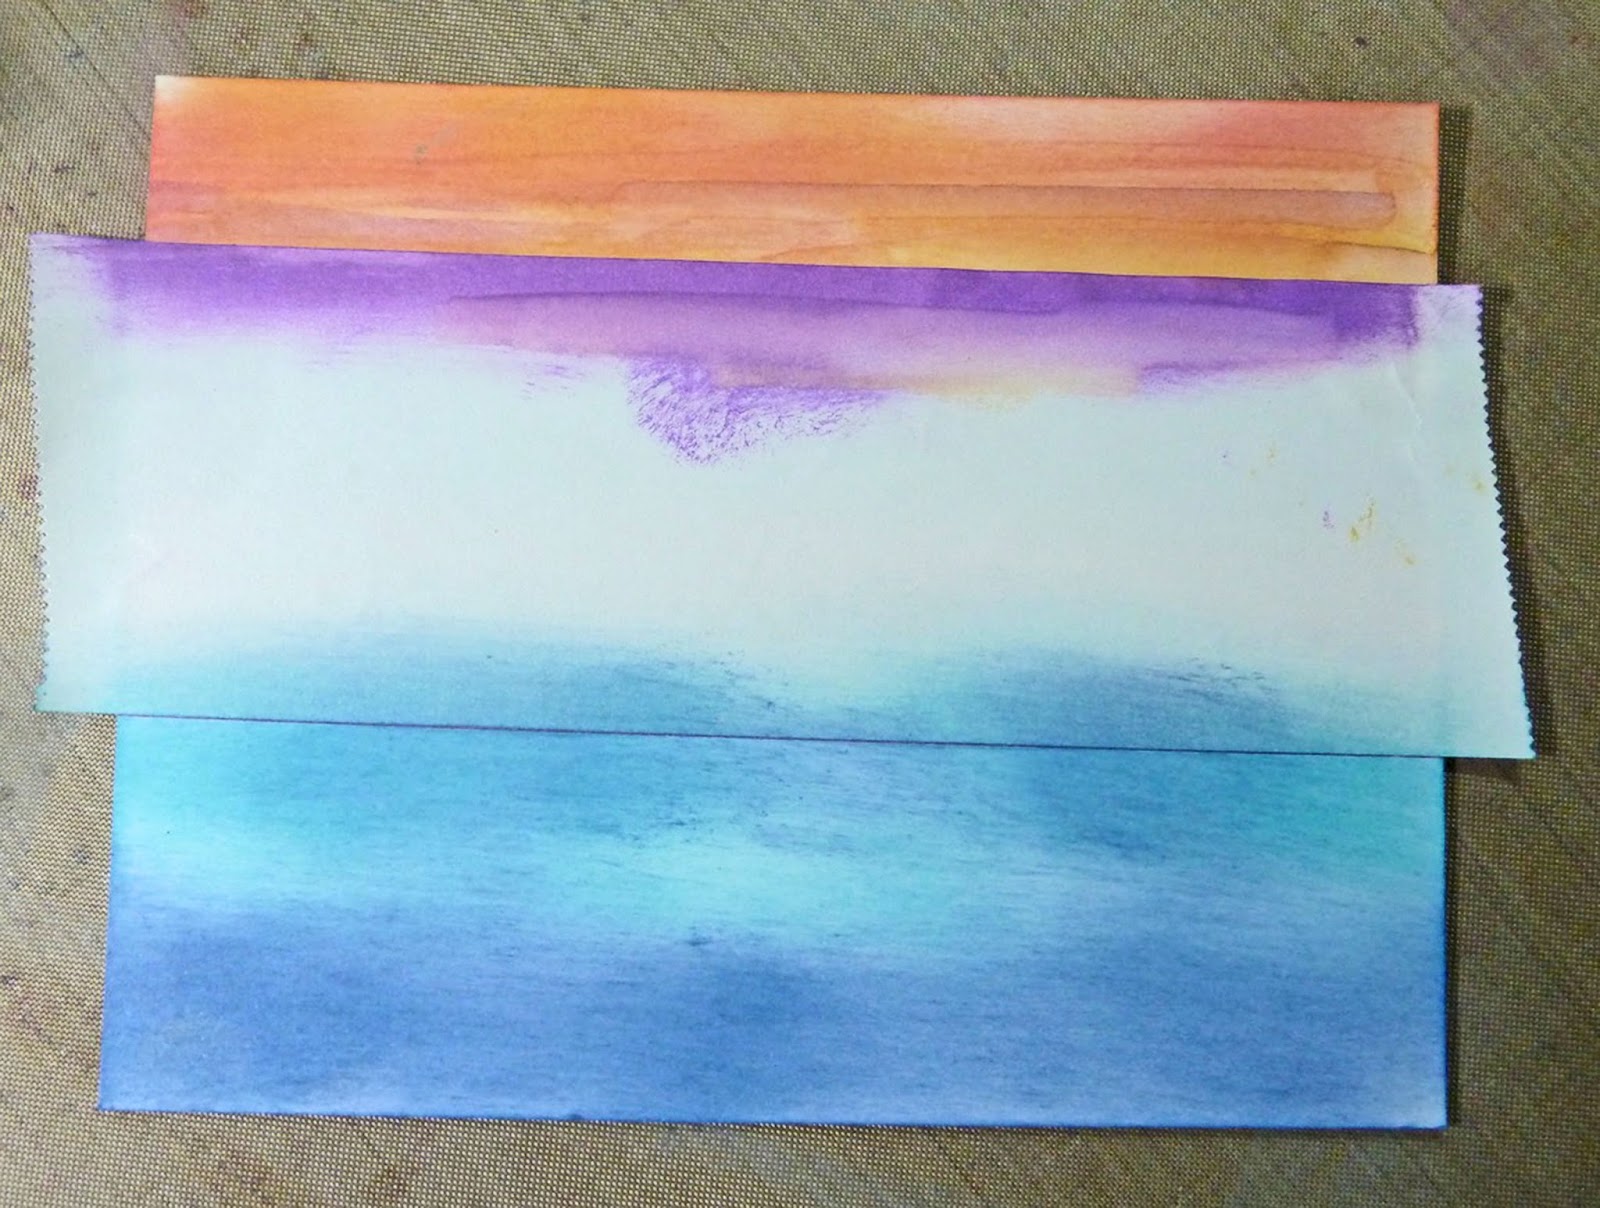
Then, the fun part…..carefully removing the tape to reveal my creation!

Next, I stamped Magenta Cling 0677-N, Branch at different heights and angles to create interest in the lower part of the card.

I used Wilted violet Oxide ink….isn’t fun when we artists can make our branches Violet if we want to?!

Sometimes we can see the moon in the early evening, before it is quite dark. We’ve all had fun this past year using circle masks on some of our scenery cards. I haven’t ever found a crescent moon stamp or stencil, so I set about to make one. I sort of discovered it by accident when cutting some acetate to create positive and negative round circle masks and stencils. On my desk, one of the positive circle masks slipped over the negative stencil circle area, and I quickly noticed a space that was a crescent moon shape! Voila!

On this photo,(with acetate pieces against black paper for better visibility) you can see how I arranged the acetate mask and stencil to reveal a crescent moon shape.

The strip of Washi Tape held the positive circle mask in the right position over the negative circle stencil, and more Washi Tape held the entire piece of acetate on the card so it didn't shift. I pounced Hero Arts Unicorn White ink through my hand-made crescent moon stencil. After it dried, I applied another layer of the same ink which made the image a little darker.

Next, I carefully removed the stencil and let the white ink dry thoroughly. I also stamped Magenta 07.614 D “Beauty is Everywhere” in the left area of the panel, using Black Versafine ink.
Lastly, I wrapped some White, Silk 1/4” ribbon by May Arts around my panel on the left hand side, tied it in a small bow, and adhered the panel to a So Silk Purple card stock panel. I trimmed the purple panel to a create a 1/16” border, and then mounted my project on a folded white card.
Art ’n Soul has many beautiful colors of May Arts 1/4” Silk Ribbon in stock. I love this gorgeous ribbon because you can tie a bow with on a card without adding very much bulk. We also have the Hero Arts Unicorn White ink back in stock. If you don't have this great white ink, you should acquire some!
I hope you enjoy this technique, and remember, we love to see your projects inspired by our weekly technique!
What's New at Art n' Soul:
This weekend is Recycled Rubber weekend! We have gotten in SO much amazing stuff and some staff have been cleaning out again. DON'T miss it! And we have AC, so come in and be cool and have some fun! Saturday 10:00 a.m. - 5:00 p.m. and Sunday 12:30 p.m. - 5:00 p.m.
We recently got in an order from our distributor, and we are restocked on lots of things, including Nuvo drops.
Our Memory Box order is due in this afternoon and will be ready for you to look at and purchase just in time for Recycled Rubber! If you have made a paid pre-order you will receive a call.
We have ordered the new 12 Oxide inks from Ranger. We are in line with lots of other people, so we don't know when we will receive it, although shipping is scheduled to start just after the holiday. Fingers crossed that we will receive it early!
Lastly, I wrapped some White, Silk 1/4” ribbon by May Arts around my panel on the left hand side, tied it in a small bow, and adhered the panel to a So Silk Purple card stock panel. I trimmed the purple panel to a create a 1/16” border, and then mounted my project on a folded white card.
Art ’n Soul has many beautiful colors of May Arts 1/4” Silk Ribbon in stock. I love this gorgeous ribbon because you can tie a bow with on a card without adding very much bulk. We also have the Hero Arts Unicorn White ink back in stock. If you don't have this great white ink, you should acquire some!
I hope you enjoy this technique, and remember, we love to see your projects inspired by our weekly technique!
What's New at Art n' Soul:
This weekend is Recycled Rubber weekend! We have gotten in SO much amazing stuff and some staff have been cleaning out again. DON'T miss it! And we have AC, so come in and be cool and have some fun! Saturday 10:00 a.m. - 5:00 p.m. and Sunday 12:30 p.m. - 5:00 p.m.
We recently got in an order from our distributor, and we are restocked on lots of things, including Nuvo drops.
Our Memory Box order is due in this afternoon and will be ready for you to look at and purchase just in time for Recycled Rubber! If you have made a paid pre-order you will receive a call.
We have ordered the new 12 Oxide inks from Ranger. We are in line with lots of other people, so we don't know when we will receive it, although shipping is scheduled to start just after the holiday. Fingers crossed that we will receive it early!


